I would like to visualise an object in 3D. My idea is using any of the camera mode do zoom in and out time to time in different parts of the objects and save these movements as animation. I could not find any way to do that as far as I have checked. I would be happy if you could give me some hints.
ParaView has several animation controls including those you can use to animate the camera. The ParaView Guide (Help -> ParaView Guide) has a chapter on animation including animating the camera. There are also exercises in the ParaView Tutorial (Help -> ParaView Tutorial) although the guide has a bit more detail on the camera controls.
Thanks for the answer. I have worked with all the camera modes (e.g. orbiting). However, I could not manage to zoom in and zoom out on the object while orbiting and save this action in addition to the orbiting.
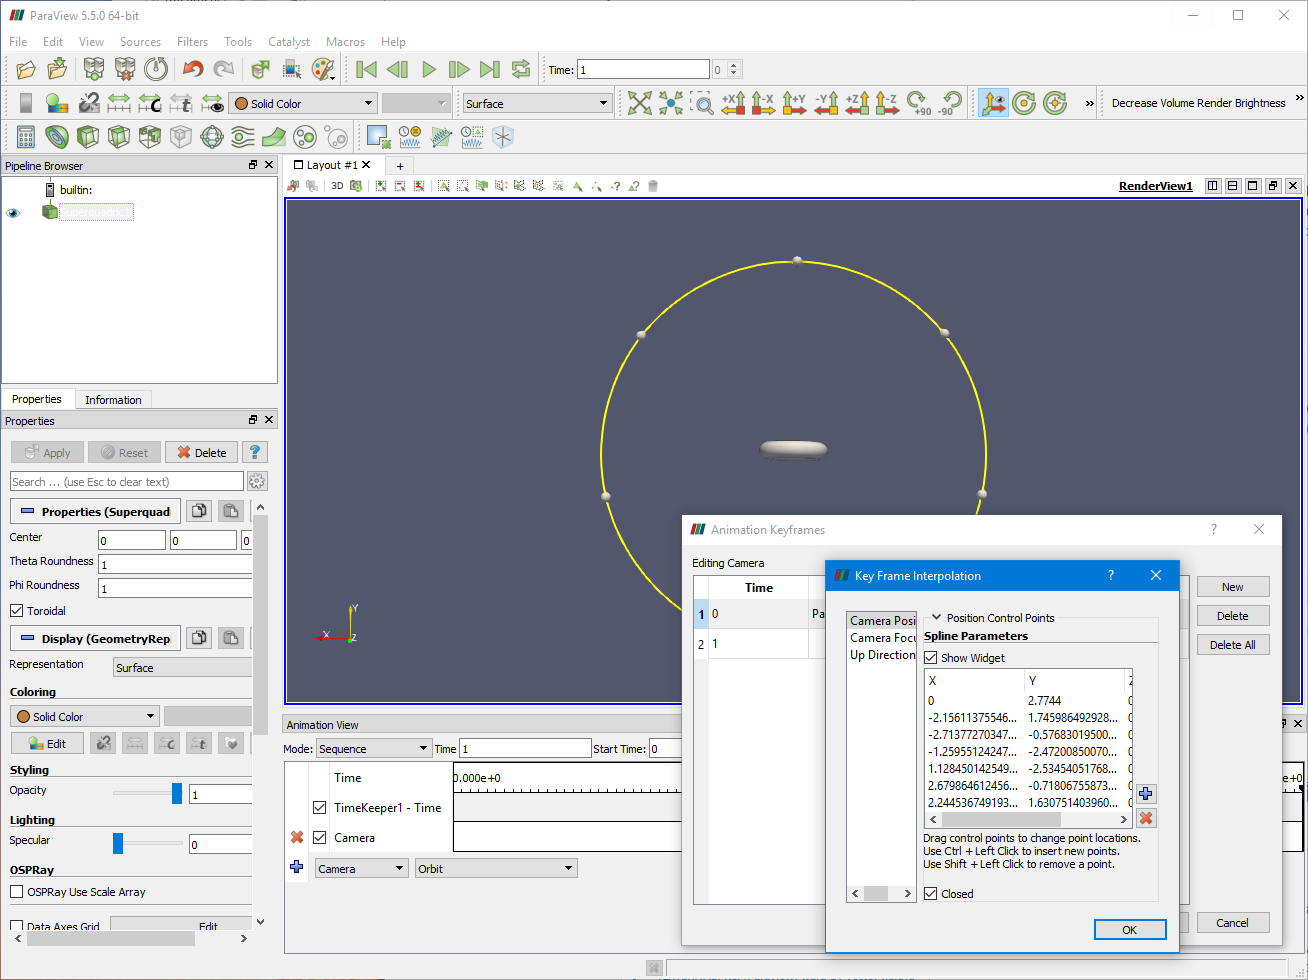
The camera controls for animation are admittedly a pain, but it can be done. After you create the Orbit animation track, use the mouse to zoom out and then rotate the camera so you are looking at the object from the top or bottom. Then, double-click the Camera track you previously created to get the Animation Keyframes diaglog. Move that dialog so that you can see the 3D view. Now, double-click on the “Path…” entry to open the Key Frame Interpolation sub-dialog box. Again, position the dialog box so you can see your 3D view. On that dialog, click Camera Position. When you do that you will see a list of control points that define a path the camera follows. You will also see in the 3D view a yellow path that the camera follows with little spheres that you can drag with the mouse. Move the points around the camera orbit so the camera zooms in and out of the view.
As Ken said, these controls aren’t very intuitive, and frankly need to be looked at again. Anyway, yet another tutorial is in the Help/ Sandia National Labs Tuturials/ Advanced Animations. We cover all four methods of animating the camera.
Once a camera track is created using the GIU, is there a way to save it in a python state file in order to use it with pvbatch? Using Save State and saving as a python file I don’t see anything related to the camera path.
Perhaps if I did a trace state it would include the animation tracks? And, further, can I access specific steps/frames of that track from pvbatch? In order to parallelize I’d like to be able to launch multiple pvbatch instances with each one rendering/saving a subset of the frames.
Any pointers to examples or tutorials on how to do this would be appreciated.
Joe,
I just tried, and it appeared to work for me with ParaView 5.5.0, using the Trace Recorder. I got lots and lots of keyFrame#### lines. Basically, I used Tools/ Start Trace [then Tools/ Stop Trace] Again, this is covered in the Sandia Tuturials listed above, under Advanced State Management - and even more in ParaView and Python.
Thanks for the pointers, Alan. I’m still not having much luck. When I use the Start/Stop Trace it seems to capture the initial state of the camera path when I add it. However, after editing the points on the path (for Follow Path) or adding key frames and setting new views (for Interpolate camera locations), those changes do not seem to be captured in the trace. After making those changes and saving the animation track in the gui, I can then play the animation in the gui, and it reflects the changes that I made. But the trace still has only the initial values, not the edited ones. Am I missing a step in there somewhere?
Sorry, life gets busy.
Maybe write up a bug, with very specific directions? I’m interested in this - let me know you did it, I will add a label to it that will get it fixed.