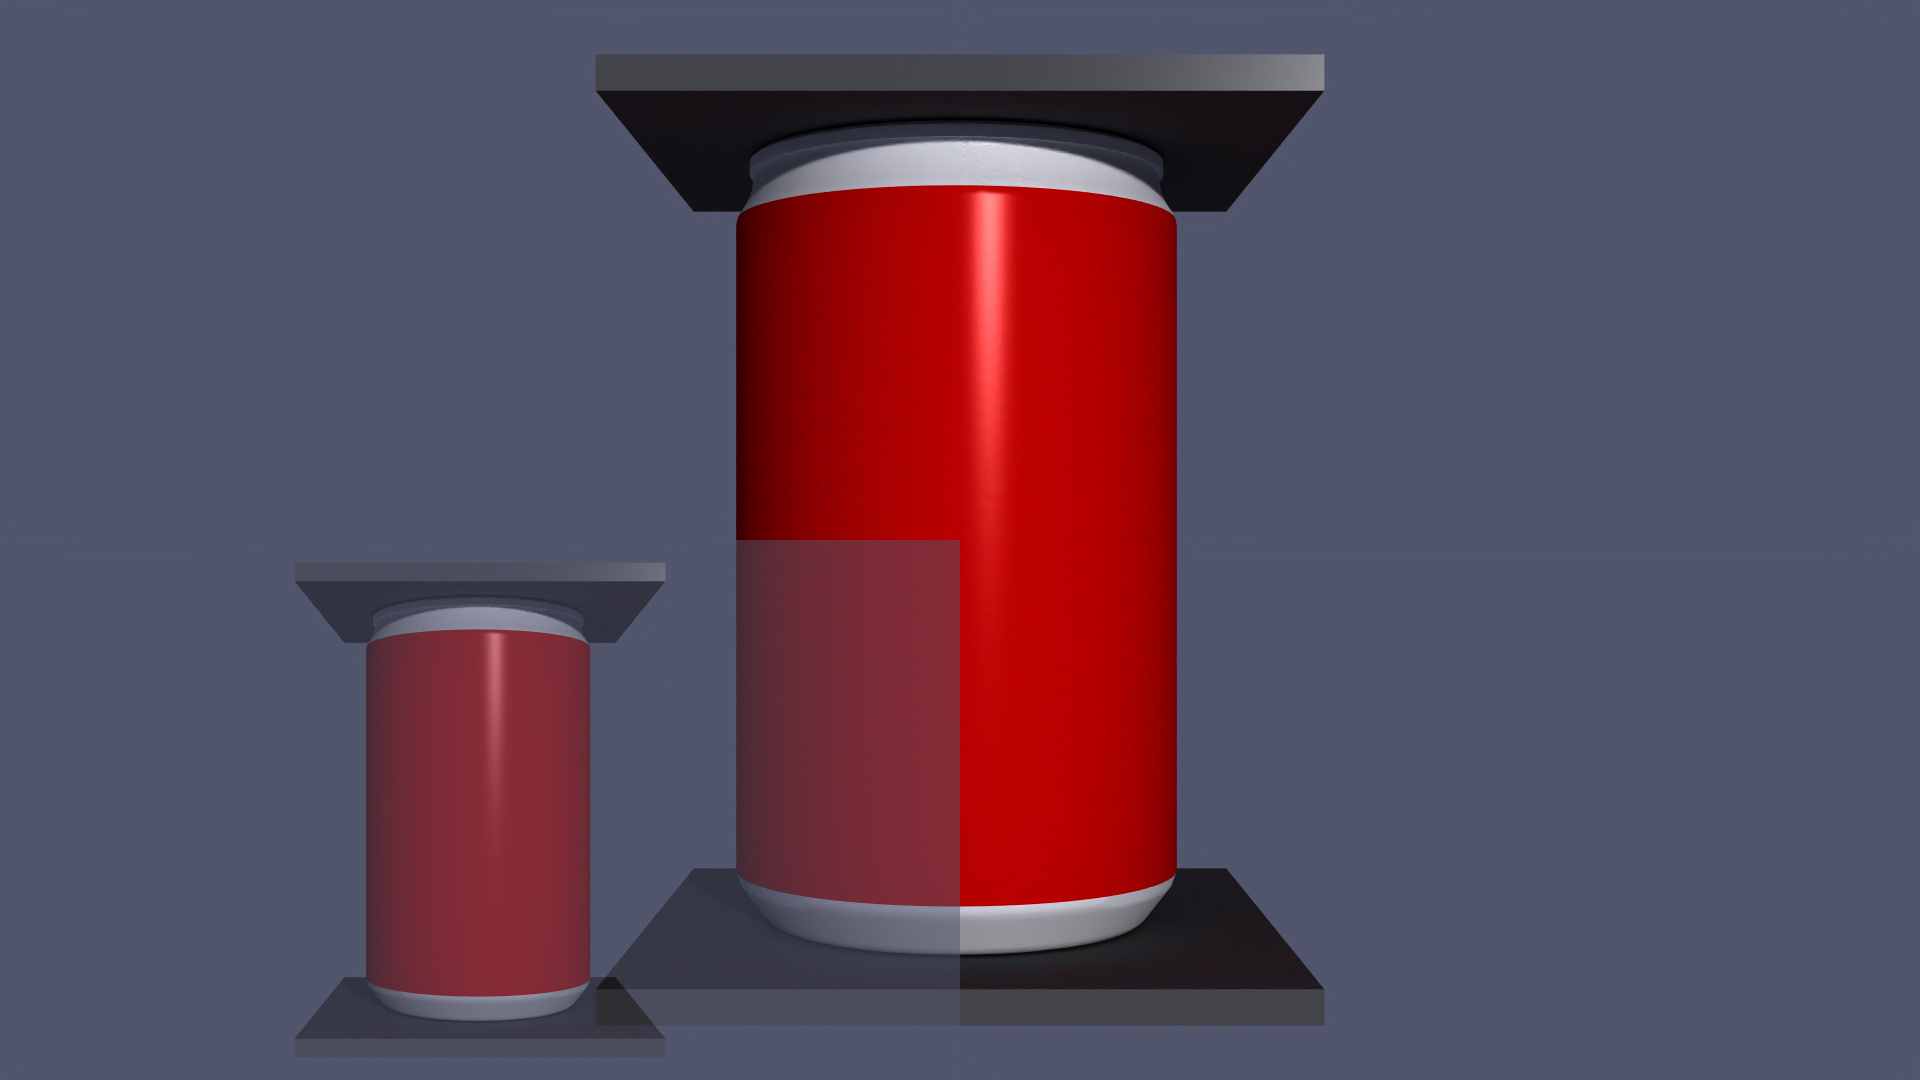
I’ve been running into this strange bug when I export my animation at a resolution different from the default 1141x646 (mainly just want 1080p). The first frame will have this transparent overlay in the lower left quadrant and will then leave behind these faint cross lines in the middle of the image for the following frames. It looks like it’s where the top right corner of the overlay was. I’ve tried locking the resolution when changing and multiple resolutions, as well as saving the animation as .avi and .png’s, but nothing has worked.
OS: Windows 10 Pro
GPU: GeForce GTX 780
Paraview: 5.7.0-RC3
I don’t see the issue when saving a screenshot at any resolution.
I only have the issue with the animations when ray tracing is enabled (either back end).
I tried with Paraview 5.7.0 and got the same issue.
I went back to 5.6.2 and actually didn’t have the issue but that version doesn’t look like it has the “denoise” feature for raytracing which requires many more samples.
It seems to be due to the image scaling when raytracing is enabled. From my testing it seems that the rendering is being done at your screen resolution and then scaled. My workarounds:
Easiest: Just output at the image at the native resolution that first pops up. This isn’t ideal since it will be some odd resolution, and you are limited on quality since size is limited by your screen size.
Better: Use headless rendering like pvbatch. From my testing it renders at the image size you set and doesn’t have to mess with scaling.
Hopefully this gets fixed at some point, as it is a very annoying bug for new users. Let me know if you have any other questions.
Ah I see, glad to know that I’m not the only one who has seen this. I’m new to ParaView so I’m not sure what pvbatch is but I’ll look into it.
Is there no way to change the ParaView GUI default resolution so that I would have to worry about changing it? Because yes, this doesn’t happen if I leave it as the default (~1100 x 650). My physical screen resolution is set to 1440p so I know it’s not basing this off of that.
No problem. Unfortunately, is it not due the default value set by Paraview. It is due to the actual render window size on your computer. Even though your screen may be 1440p, the size of the render window is ~1100x650. You can maximize it by closing other view stuff and trying to make the screen as large as possible. Although, once again you will be limited in the size you can output by your computer screen size.
Pvbatch is a way to run Paraview using python instead of the GUI. Since the GUI is no longer setting the render window, you can set it to whatever size you want.
Another work around that may work if you only want your screen resolution is to use the detached window mechanism and resize the detached windows to your screen size :
Another work around that also may work is to use multiple of you window resolution. there is a dedicated button for that when changing your resolution :
I experienced the same problem when using pvbatch/pvpython rather than the gui. This was fixed by setting the resolution of individual windows in the python script to add to the exact resolution at which they were eventually output. For example
...
# set desired image resolution, note that (5120, 4320) = (640*4 + 640*4, 1080*4)
res = (5120, 4320)
renderView1.ViewSize = [640*4, 1080*4]
renderView2.ViewSize = [640*4, 1080*4]
# ViewSize was [640, 1080] and this caused the problem
...
layout1 = CreateLayout(name='Layout #1')
layout1.SplitHorizontal(0, 0.5)
layout1.AssignView(1, renderView1)
layout1.AssignView(2, renderView2)
...
SaveScreenshot('name.jpeg', viewOrLayout=layout1, ImageResolution=res, Quality=100, Progressive=1)