Since mr and mr, ParaView master now has a support for ssh, which includes port forwarding.
In order to use it, you will need first to install a terminal and an ssh tool.
Terminals are available by default on Windows, Mac and virtually on all linux distribution.
Ssh is available by default on mac, on all package manager on all linux distribution.
On windows ssh is now available by default with the Windows 10 Spring update but we recommend installing Putty as support for rc connection is better with it.
Then you will need to write a .pvsc file.
Here are some examples.
1. Simple Server Startup trough ssh command
If you want to run your pvserver trough a ssh command , usually:
ssh user@remote /path/to/runServer.sh port arg2...
You will need to write a .pvsc file similar to this :
 <Servers>
  <Server name="SimpleSshServer" resource="cs://remote:port">
    <CommandStartup>
      <SSHCommand exec="/path/to/runServer.sh" timeout="0" delay="5">
        <SSHConfig user="user">
          <Terminal/>
        </SSHConfig>
        <Arguments>
          <Argument value="$PV_SERVER_PORT$"/>
          ...
        </Arguments>
      </SSHCommand>
    </CommandStartup>
  </Server>
</Servers>
When you connect to this server, an automatically detected terminal will open and ask you for your password if it is needed, then the server script will run and ParaView will connect to the remote as usual.
If Terminal is not specified, the terminal used to open ParaView would be used, if available.
On linux and Windows it is possible to specify the terminal executable to use with
<Terminal exec="/usr/bin/xterm"/>
On linux, it is also possible to not use a terminal but an askpass implementation. First install a askpass package then specific <AskPass\> in your .pvsc file.
On all OS, it is possible to specify the path to ssh executable with the following
<SSH exec="/usr/bin/ssh"/>
2. Simple Reverse Connection Server Startup trough ssh command
If you want to run your pvserver trough a ssh command , usually:
ssh user@remote /path/to/runServerRC.sh clientHost port arg3...
You will need to write a .pvsc file similar to this :
 <Servers>
   <Server name="SimpleRCSshServer" resource="csrc://remote:port">
     <CommandStartup>
       <SSHCommand exec="/path/to/runServerRC.sh" timeout="0" delay="5">
         <SSHConfig user="user">
           <Terminal/>
         </SSHConfig>
         <Arguments>
           <Argument value="$PV_CLIENT_HOST$"/>
           <Argument value="$PV_SERVER_PORT$"/>
         </Arguments>
       </SSHCommand>
     </CommandStartup>
   </Server>
 </Servers>
It will open a Terminal to input your ssh password and the pvserver will then connect to ParaView with an RC connection as usual. It actually is not very different from the previous one.
3. Secured Connection to a Server trough ssh tunnel
To communicate securely trough a ssh tunnel, something usually done with :
ssh -L 8080:localhost:port user@remote /path/to/runServer.sh port
You would then connect on a server on localhost:8080 on ParaView, which is not very elegant.
This is now natively supported with the following .pvsc file
<Servers>
  <Server name="SSHPortForwardingServer" resource="cs://remote:port">
    <CommandStartup>
      <SSHCommand exec="/path/to/runServer.sh" timeout="0" delay="5">
        <SSHConfig user="user">
          <Terminal/>
          <PortForwarding local="8080"/>
        </SSHConfig>
        <Arguments>
          <Argument value="$PV_SERVER_PORT$"/>
        </Arguments>
      </SSHCommand>
    </CommandStartup>
  </Server>
</Servers>
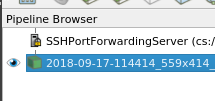
It will open a Terminal to input your ssh password if needed, and then ParaView will connect to the server trough the ssh tunnel, but the displayed remote and port will be correct, the tunneling being actually hidden at high level. You may remark this small lock on the server :

Which means the communication is secured.
The server script takes an argument, PV_SERVER_PORT, so pvserver know which port to listen to.
3. Secured Reverse Connection with a Server trough ssh tunnel
To communicate securely trough a ssh tunnel, something usually done with :
ssh -R 8080:localhost:port user@remote /path/to/runServerRC.sh localhost 8080
You would then connect on a reverse connection server on localhost:8080 on ParaView, which is not very elegant.
This is now natively supported with the following .pvsc file
<Servers>
  <Server name="SSHPortForwardingRCServer" resource="csrc://remote:port">
    <CommandStartup>
      <SSHCommand exec="/path/to/runServerRC.sh" timeout="0" delay="5">
        <SSHConfig user="user">
          <Terminal/>
          <PortForwarding local="8080"/>
        </SSHConfig>
        <Arguments>
          <Argument value="localhost"/>
          <Argument value="$PV_SSH_PF_SERVER_PORT$"/>
        </Arguments>
      </SSHCommand>
    </CommandStartup>
  </Server>
</Servers>
It will open a Terminal to input your ssh password if needed, and then ParaView will let itself be connected by the rc pvserver trough the ssh tunnel, but the displayed remote and port will be correct, the tunneling being actually hidden at high level, as in the previous point, with the lock on the server icon.
The server script here take two arguments, first the client ip to connect to, localhost, and the port to use for the connection PV_SSH_PF_SERVER_PORT, which will be set by paraview.
4. How to dynamically change a parameter like user of Terminal executable
As all .pvsc file, this support options as well, and using the following .pvsc file
<Servers>
  <Server name="SimpleSshServer" resource="cs://remote:port">
    <CommandStartup>
      <Options>
        <Option label="SSH USER:" name="SSH_USER" save="true">
          <String default="username"/>
        </Option>
        <Option label="Terminal:" name="SSH_EXEC" save="true">
          <String default="/usr/bin/ssh"/>
        </Option>
        <Option label="Terminal:" name="TERMINAL" save="true">
          <String default="/usr/bin/xterm"/>
        </Option>
      </Options>
      <SSHCommand exec="/path/to/runServer.sh" timeout="0" delay="5">
        <SSHConfig user="$SSH_USER$">
          <Terminal exec="$TERMINAL$"/>
          <SSH exec="$SSH_EXEC$"/>
        </SSHConfig>
        <Arguments>
          <Argument value="$PV_SERVER_PORT$"/>
        </Arguments>
      </SSHCommand>
    </CommandStartup>
  </Server>
</Servers>
Will work as point 1 but will let you specify the ssh user, ssh executable and terminal executable to use in a dialog.
5. What are the limitations
We do not support Data/Render server connection as it would require setting up multiple ssh tunnells.
This can still be done manually of course.
Some example files if needed.
server_rc.sh (85 Bytes)
server.sh (74 Bytes)
servers.pvsc (2.6 KB)